Editor’s note. This is a revisit and expansion of our January 3, 2025, review, “The Renaissance Secret: Understanding the Role of Egg Yolk in Old Masters’ Oil Paints.” We revisit this topic because it matters not only for historical reconstructions but also for today’s painters who seek greater control over impasto, drying, and surface quality. In short, this is a practical guide to egg yolk oil paint for contemporary studios.
A 2023 study in Nature Communications by Ranquet, Duce, Bramanti, Dietemann, Bonaduce, and Willenbacher examined the behavior of egg yolk oil paint and how yolk additions affect handling and drying. The team built two studio‑like systems. First, pigments are pre‑coated with a thin egg layer and then milled in oil (protein‑coated pigments). Second, ordinary oil paints stiffened by tiny yolk additions mixed on the palette (capillary suspensions). They used linseed oil with lead white and ultramarine blue. The team tracked flow, drying, peroxide build‑up, and film chemistry…
Key Takeaways
- This revisit includes a quick decision tree for choosing methods, practical starting ratios, troubleshooting guides for humidity, wrinkling, and sinking-in, as well as bench tests that can be run in an afternoon.
- Small amounts of yolk can significantly raise yield stress, allowing brush marks to stand out, yet strokes still feel smooth.
- Pre‑coating pigments with egg helps stop humidity‑induced “mystery stiffness” (an unexpected, humidity‑triggered thickening of oil paint—often lead white—caused by trace water creating capillary bridges between pigment particles), especially with lead white.
- Egg yolk slows early oxidation and favors tighter cross‑linked networks; drying starts later and proceeds differently.
- Wrinkling (buckled surface ridges that form when a fast‑curing top skin expands over still‑soft paint beneath) risk drops when yield stress is high; yolk can raise it without overloading pigment.
- Distribution matters: egg as a uniform pigment coat behaves differently than egg as tiny bridges inside the paint.
How Old and Modern Painters Combine Egg with Oil
Painters have mixed oils and proteins in more than one way. The study models two routes that map to studio practice [pp. 2–3]. First, grind the pigment with a diluted yolk, let it dry, and then mull it with oil. This creates protein‑coated pigment. Second, add a drop or two of fresh yolk to the oil paint on the palette and mix with a knife. This creates a capillary suspension. Both differ from egg tempera and tempera grassa [p. 2]. Those are water‑based during application. Here, the oil stays continuous.
However, why use egg at all? It changes how particles touch and how the oil cures. It also buffers humidity effects. Therefore, these changes are evident in both handling and in the film obtained after drying.
Historical context in brief
Artists’ paintings from the fifteenth and sixteenth centuries sometimes show proteinaceous traces alongside drying oils. Interpretations vary by site and sampling, but a mixed oil–protein practice is plausible in several workshops. The present study does not prove individual artists’ recipes; rather, it models two credible mechanisms that explain observed handling and film properties.
What Egg Yolk Oil Paint Does to Wet Paint
Practical starting ratios — studio guidance you can follow
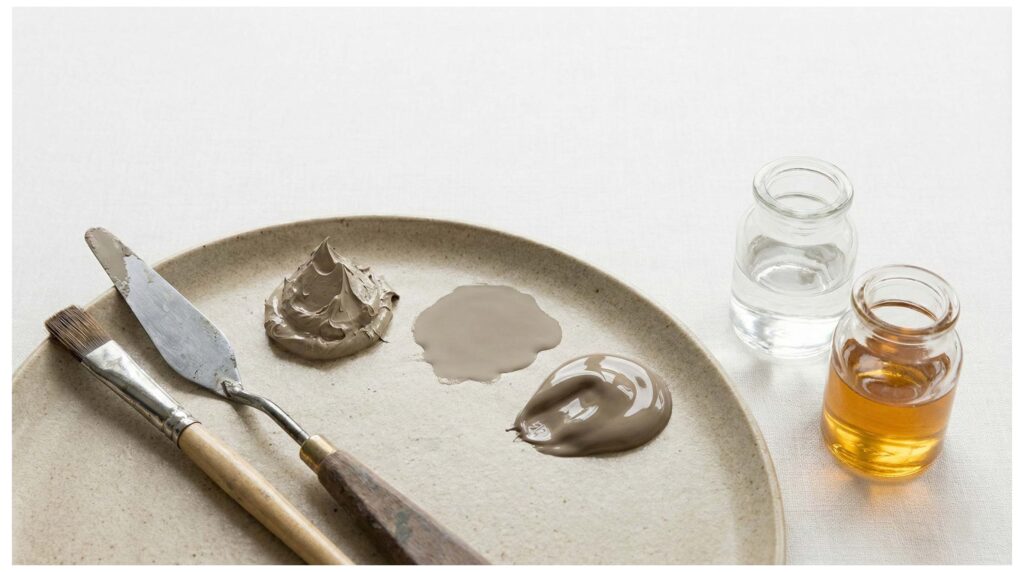
Capillary suspension — step by step
- Set up. Lay out the oil color, a clean palette knife, a small dish for yolk, a pipette (or a clean brush tip to deliver a drop), and a primed test card.
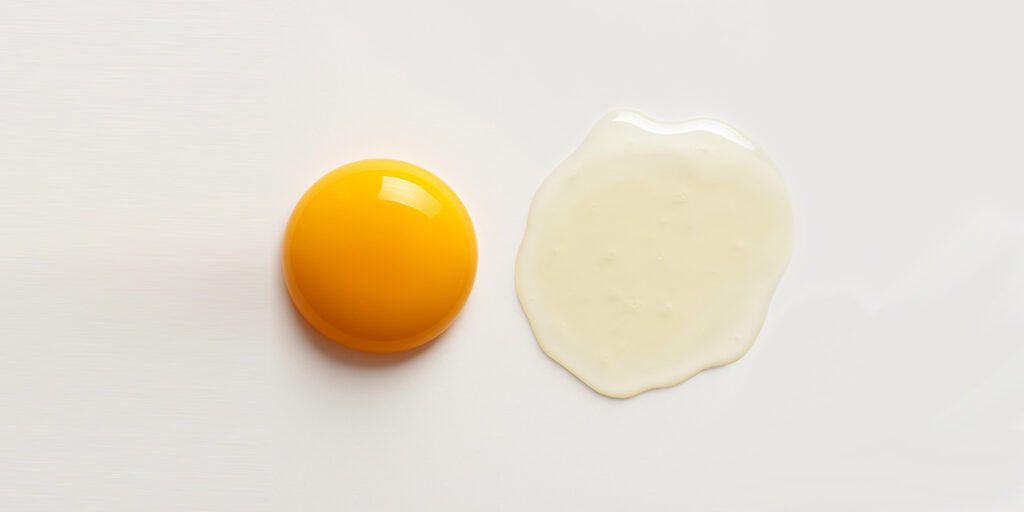
- Prepare the yolk. Separate the yolk from the white. Roll the yolk gently on a paper towel to remove albumen residue. Puncture the sac and decant the liquid yolk into the dish.
- Make a tiny trial mix. Place a pea‑sized amount of oil paint (about what you’d use for a single stroke) on the palette. Add one small drop of yolk and smear and fold with the palette knife 20–30 passes until streak‑free. Rest 2 minutes, then give 10 more passes to finish the dispersion.
- Evaluate. Pull a 3–4‑inch stroke on the test card. If the ridge slumps immediately, fold in one more small drop. If the stroke feels gummy or drags excessively, split the mix and soften with a touch of linseed oil to restore brushout.
- Scale up cautiously. When the trial is complete, scale to working amounts using the same drop-per-paint proportion. Work in small batches that you can use the same day.
- Pot life and hygiene. Do not add water. Use within the painting session. Discard at any sign of odor.
Protein‑coated pigment — step by step
- Make a yolk sizing. Mix 1:1 yolk to distilled water by volume. As a starting point, plan to use 4–6 grams of this sizing per 100 grams of pigment, which yields roughly 2–3% yolk solids in the pigment once it is dry.
- Wet to a paste. On a glass plate, add the sizing in small aliquots to the pigment and mull to a smooth, stiff paste. Aim for particles to appear just sheened—no free liquid pooling.
- Dry to completion. Spread a thin film on glass or tile and dry in a dust-free area for 24–48 hours (or longer in humid conditions) until it becomes brittle and odorless.
- Granulate and store. Scrape up, break into granules, and sieve if needed. Store dry and sealed, accompanied by a small desiccant sachet.
- Remull with oil. Mull the coated pigment with linseed oil to a paste. Let the paste rest for 30 minutes, then adjust the oil to achieve the desired working consistency. Make a small swatch before committing to larger batches.
These ranges are a guide, not absolute targets. The type of pigment and oil will affect the amounts you need; record what works in your studio.


Responses